
Chrome is widely known for being a memory void, demanding a lot in terms of processing power from users. With Memory Saver turned on, a slow Chrome browser can turn into something a lot more manageable. Here’s how to turn it on.
Memory Saver for Google Chrome is pretty basic in function. When turned on, Chrome will change how it approaches background tabs. Rather than letting them update and process in the background, background tabs are disabled, which stops them from taking up resources.
Of course, this means that websites that update regularly won’t be able to do so if left inactive for a small amount of time. The benefit to that, though, is those tabs take up no resources and let your computer focus on what you’re actually seeing.
For those that like to open 10+ tabs at any given time, Memory Saver is a must, as it completely counteracts the negative effects of opening up five or more tabs, which would otherwise absolutely drain your machine of precious RAM.
How to turn Memory Saver on in Chrome
- In Google Chrome on your computer, tap the three-dot menu next to your profile photo.
- Click Settings.
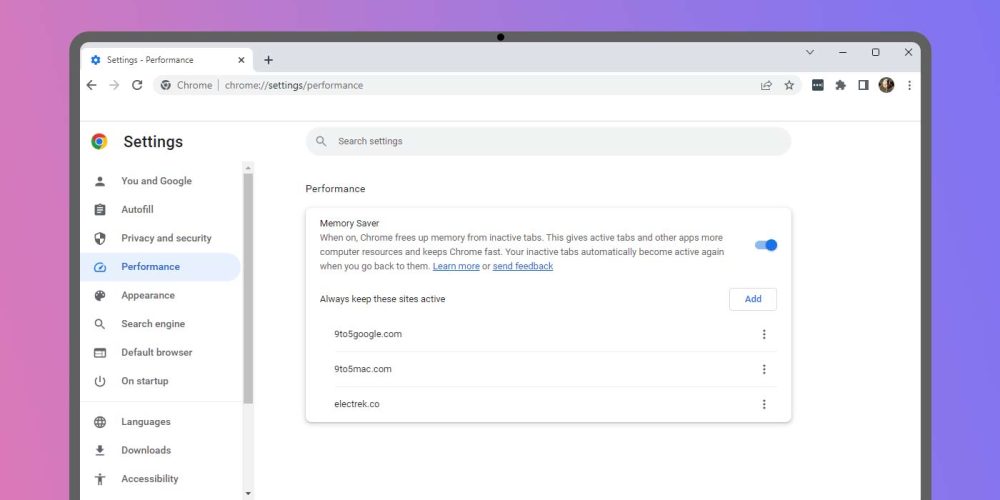
- In the Performance section, click the toggle next to Memory Saver.
You won’t notice a huge difference right away with limited tabs; however, if you open a ton of them and go about your usual browsing, you should be able to see a distinct difference in computer performance.
Memory Saver doesn’t disable media playing in the background, which means you can keep background tabs playing music, podcasts, or YouTube videos. What it will disable is any site that takes resources without providing an immediate benefit, such as playing music. Those tabs will have a new indicator letting you know that it’s been marked as inactive. That indicator will also give you an estimate of how much memory was saved.
You can whitelist sites that you don’t want to be disabled when Memory Saver is turned on as well. If you find that you need certain sites to be active in the background, simply hit Add next to Always keep these sites active. From there, just enter the URL of the site you want to be immune to Memory Saver.
If you don’t notice a difference or aren’t happy with how Chrome performs with the feature turned on, you can always disable it and move on. However, if you frequent enough tabs for them to start physically shrinking to make room in the tab bar, you might want to consider leaving Chrome’s Memory Saver on.
More on Google Chrome:
- Google Chrome is getting a redesign on desktop – here’s a sneak peek [Gallery]
- Microsoft aggressively trying to keep Chrome downloaders using Edge
- Microsoft aggressively trying to keep Chrome downloaders using Edge
FTC: We use income earning auto affiliate links. More.


Comments