Whether you’re trying to save on energy usage, set a schedule, or just make it more convenient to adjust the temperature of your home, the Nest Thermostat line has been available for years to do it all. Now, the Nest Thermostat (2020) has hit the market with a new design, updated software, and the most affordable price to date. Here’s what you need to know.
New Design |
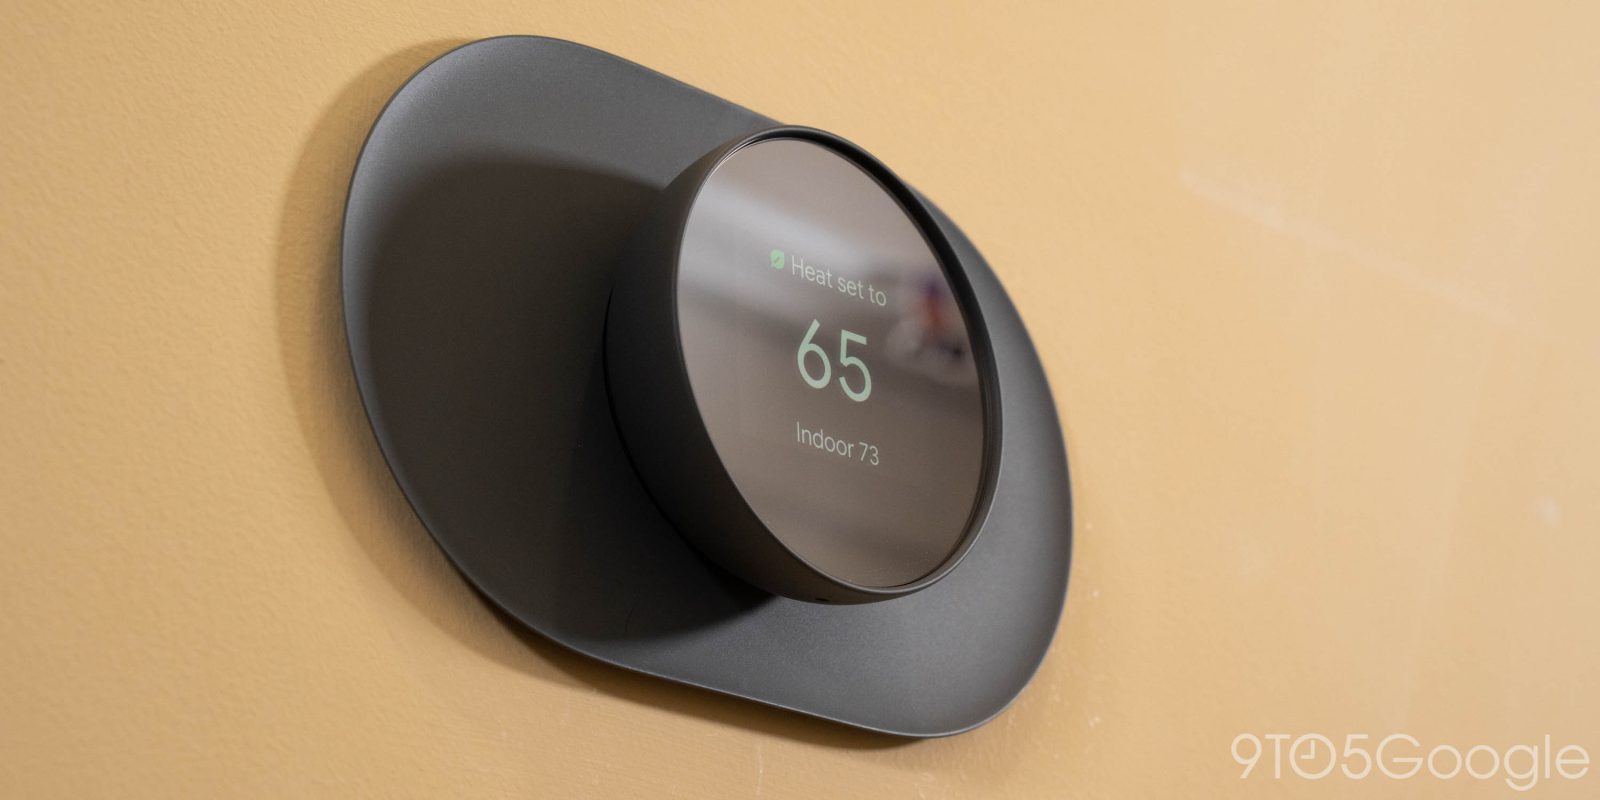
The new Nest Thermostat is a brand new design. It retains the same round shape, but with a new mirror-finish on the display. It’s a good look, but may feel out of place in some homes. Luckily, there are more color choices than the previous Nest Thermostat E which only came in white. I opted for the dark “Charcoal” color, but you can also get “Snow,” “Sand,” or “Fog” to best suit your home.
In terms of the physical hardware of the new Nest Thermostat, it works, but I can’t say it’s particularly impressive. The entire device is made from matte plastic which feels fine, but also rather cheap. Sacrifices had to be made to get to $130, and I’ve got no problem with that considering you’ll rarely be touching the physical device anyway.

The looks are really what matters, and I think Google nailed it. The compact size of the Nest Thermostat (2020) fits in a similar footprint as the Nest Thermostat E, but the edges are a bit sharper. Most likely, you’ll definitely need the trim plate to cover up the hole and damage left by your previous thermostat. It’s not included in the box, though, being a $15 add-on purchased from the Google Store. That does present the opportunity to mix and match colors if you want, though.
Obviously, though, the most important part of the new design is the mirror finish on the display. When there is nothing being shown on screen, the display is basically a tinted mirror that looks very slick from a distance. When the screen does turn on, the entire software UI is shown on a 2.4-inch LCD under the mirror. From a distance, it looks really nice, but as you get closer or if you spend time looking at the device when it’s dark in the room, you can see the edges of the display which breaks the illusion. Overall, though, I have few complaints. The display is sharp enough for what it’s trying to accomplish. Unfortunately, though, I can’t speak to how the brightness holds up to sunlight as my thermostat is in a hallway without any windows.
There are two tweaks to the hardware that I really like too. For one, this device uses a Soli sensor to detect when you’re approaching the thermostat and turns on the display. Previous models did this with an ambient light sensor and, really, it didn’t work all that well. The new version, however, detects people almost immediately.
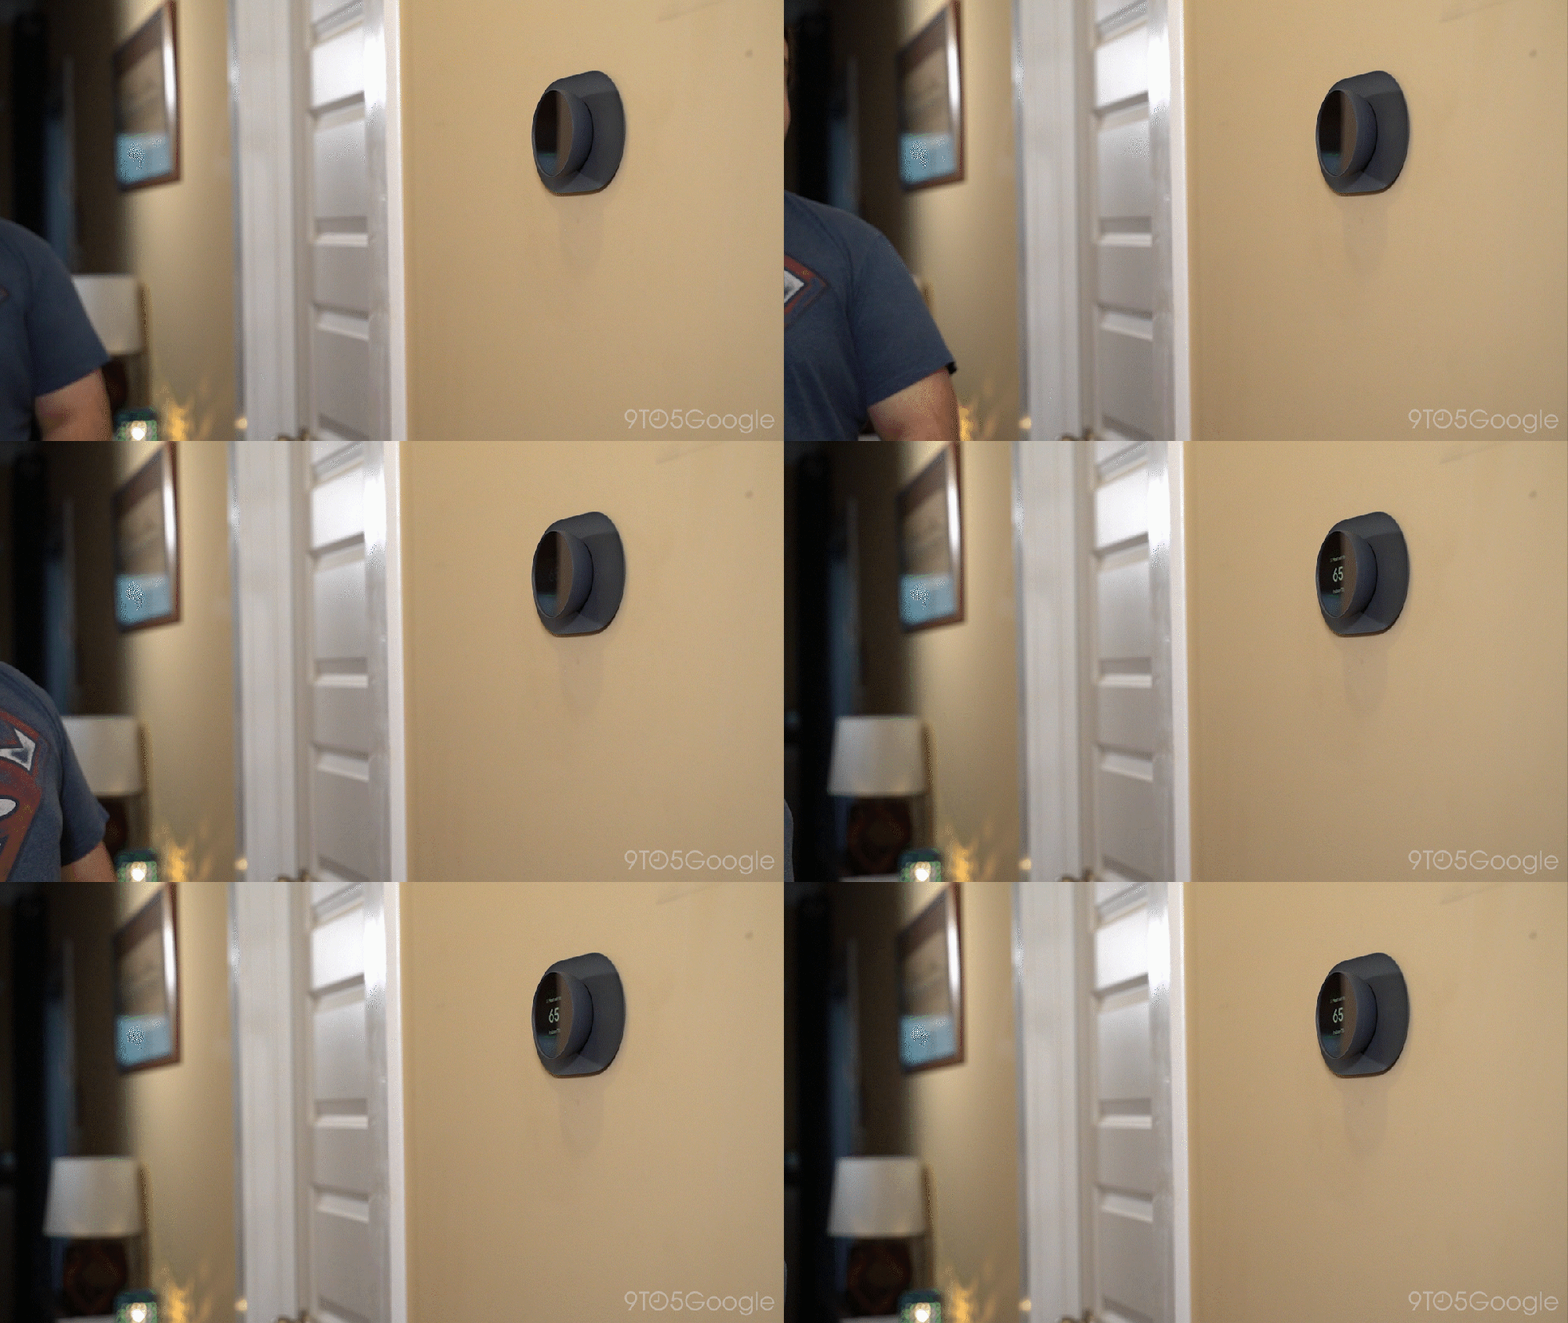
Another really small touch that I quite liked was that it is significantly easier to remove and replace the new Nest Thermostat face compared to older versions. It can be removed with a reasonable amount of force and goes back on with a confident click. This is obviously something you’ll rarely be doing, but considering the 2020 Nest Thermostat now has batteries within (color-matching!) it’s a nice tweak.
Setup, Software, and Controls |
The 2020 version of the Nest Thermostat also brings some pretty big changes for the software, from how you set it up to how you use it.
In terms of setup, that starts with the fact that everything is now handled by the Google Home app – this new model doesn’t even appear in the Nest app. We’ll dive into how that affects the software later, but looking at just the actual setup process, everything is still very well explained and easy to follow. I also love that Google really pushes on the important steps, like making you take a photo of the wiring of your old thermostat before removing it.
We’ve got a few screenshots of the process below, but here’s the summary. Google will go over what physical parts you need to do first, where the wiring needs to go, and will tell you how to do things as safely as possible. If you have any experience, you’ll be able to handle this no problem.

Let’s also briefly talk about the physical process of getting the new Nest Thermostat installed. Here, things aren’t all that different compared to previous versions of the product. In my case, I was moving from a Nest Thermostat E, essentially the predecessor to this device. So moving over was basically a case of taking a picture of the original setup, swapping the wires around, a drilling a couple of new holes.
Notably, the mounting ring for the new version is a bit smaller, so if you are switching from one model to another, you can’t reuse all of the same holes. As far as the wires go, it feels a bit more cramped, but the wire connection points also feel easier to use, so it’s a tradeoff. Of course, if you’re installing from scratch, be sure to carefully pay attention to the directions and, if you feel intimidated, hire someone who knows what they’re doing. The last thing you want is an HVAC system that you can’t get back online without an emergency call to a company.
Notably, the installation is much easier if your system has a C wire set up already. Google says that most people don’t need this wire, but quite a few early buyers without that wire have run into issues getting this latest model working properly. Your results may vary.
Moving on from the install, there’s the on-device software. Google has given the UI a fresh coat of paint that really fits in with the company’s aesthetic as of late. The text and various UI elements are inviting and feel natural in your home rather than sticking out. Everything is also easy to understand, something that often can’t be said about traditional thermostats.
To navigate through the software, you’ll be using a small touchpad on the right side of the device – gone is the rotating design of former Nest Thermostats. Google says it did this to cut costs and, honestly, I can’t really argue against that. The rotating bezel of older models was really nice, but this touchpad gets the job done. My sole complaint is that the pad feels a bit too small. Often I end up swiping through a menu and running out of touchpad before I’ve hit the end of the menu, a problem I never had on the E.
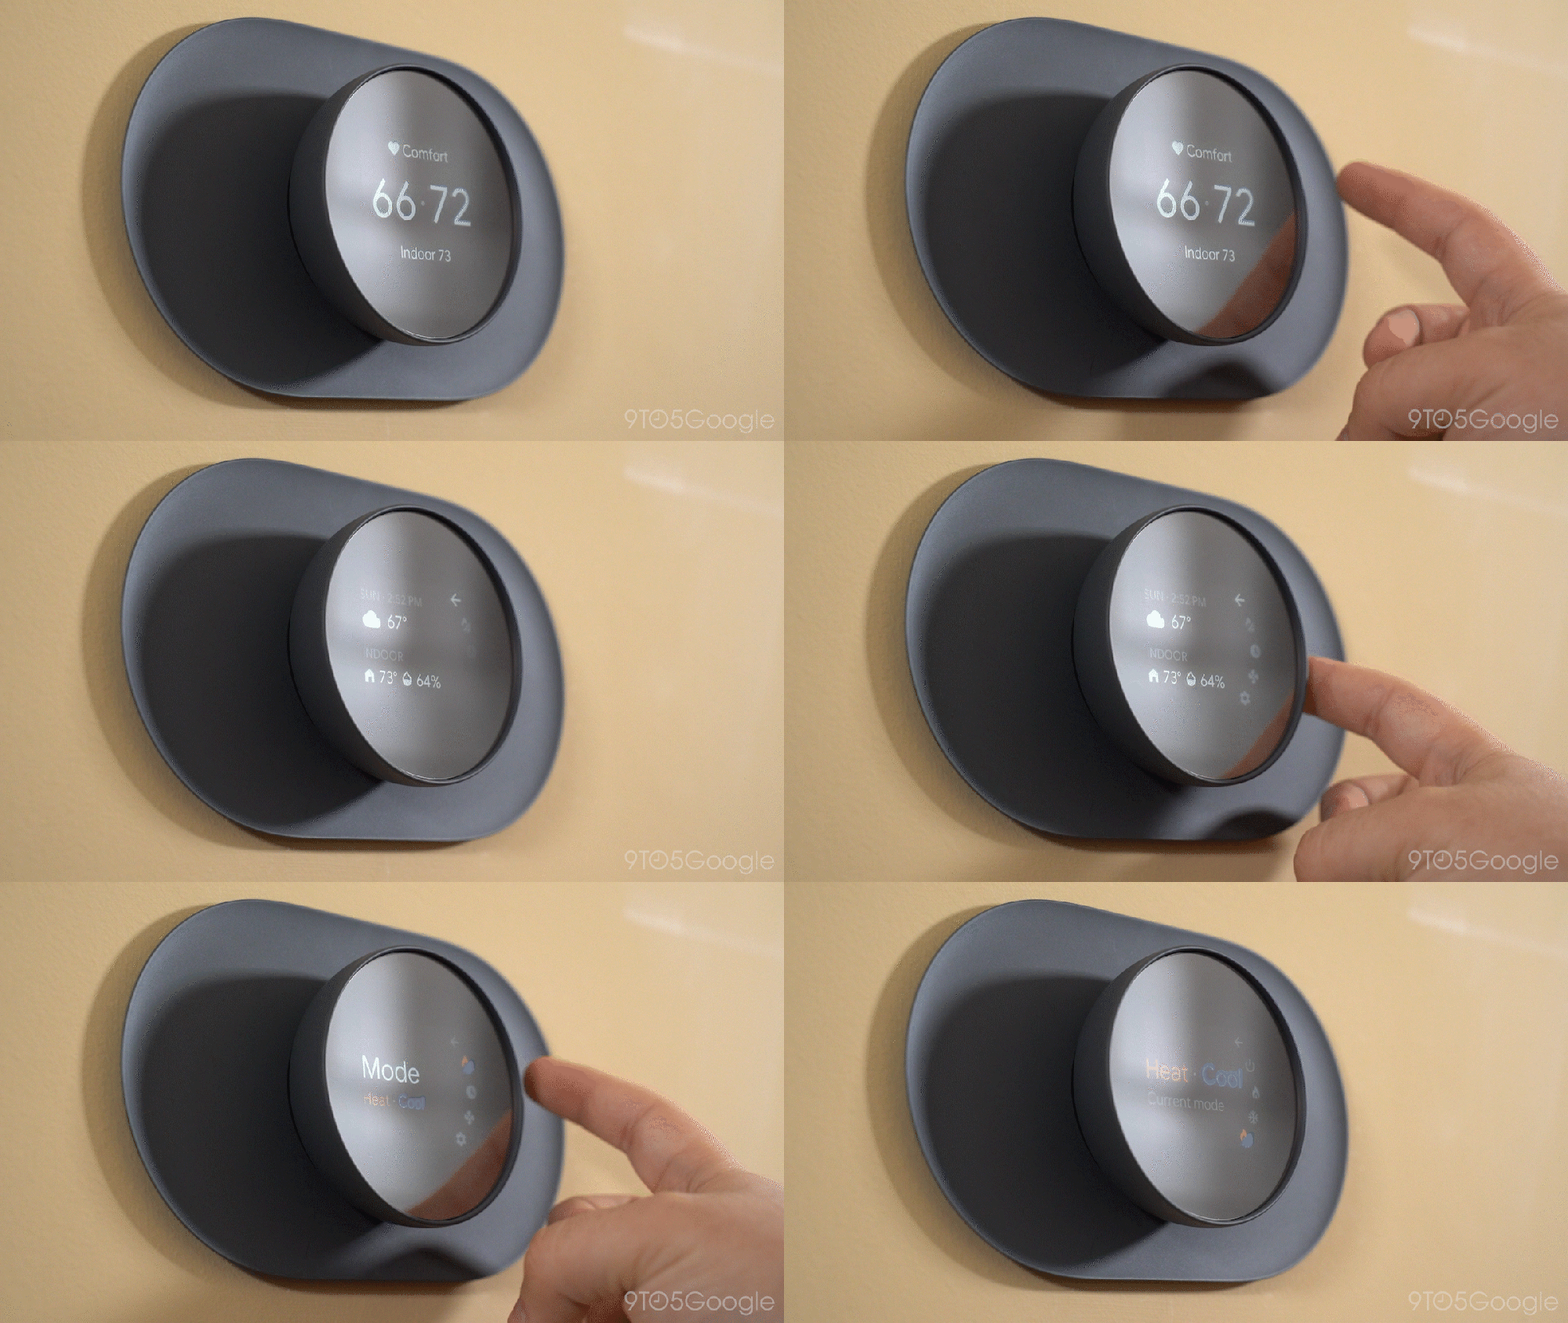
Using that touchpad, you can swipe to run through menus or adjust the temperature, but you’ll tap the side to confirm any actions or open the menu in the first place. It takes a minute to get used to it you’ve never used a Nest Thermostat before, but this 2020 version should feel familiar to anyone who’s used the lineup before.
When using the thermostat itself, Google keeps things organized pretty well. The main screen shows the current temperature setting in big text and the current actual temperature of the home directly underneath. With a tap of the side, you get the main off to the right with the time and day of the week and current weather off to the left. The info panel also shows the indoor temperature and humidity. As you scroll down, you can change the mode, hold the current settings, or activate the fan. Finally, there’s the full settings menu with emergency heat, wiring/power info, battery status, wifi details, software version and updates, and options for reboot and reset. The majority of the information you need can be accessed in the app, but certain details are only in this settings menu.

As far as the app experience goes, it feels a bit different doing everything through the Google Home app. All of the features from the Nest app are available on the Home app, but they’re found in different locations. While I do like having all of my smart home gear in one spot, I did like the simplicity of having my entire Nest ecosystem in its own app, or at least the option to have the thermostat in both places.
Really though, there’s not much to complain about with the app. The Nest Thermostat can quickly be adjusted in the Home app with the classic dial in the center of the UI. Underneath, options for switching modes, applying presets, forcing a temperature to hold until a certain time, and turning on the fan are all easily accessible.

One feature I didn’t get to use, unfortunately, is Presence Sensing. This is a new feature for the Google Home app, but it works basically the same as it did with the Nest app. The app can recognize when you’re home and when you leave and adjust the thermostat accordingly. The Thermostat’s Soli sensor can also be used to detect if someone is home, but that won’t include guests and it won’t work if the thermostat isn’t in a regularly visited area of the home.
There are two main reasons I didn’t get a chance to try this out. Firstly, COVID. It’s rare right now that both my wife and I are out of the house at the same time. Second, my current Nest setup revolves around a Nest Secure, a device Google has bafflingly decided to kill off and lacks any integration with these new Home app routines. Seriously Google, please don’t give up on that system.
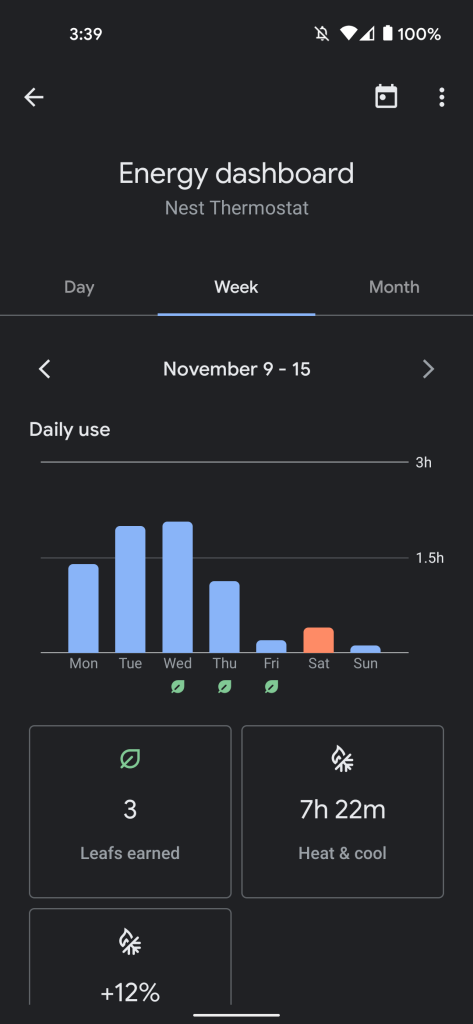
Rounding things out, the new Nest Thermostat can also show an Energy Dashboard in the app with a history of when your HVAC system has been active and for how long. Like all other Nest Thermostats, the new model has the ability to set up reminders for changing your air filter as well as send notifications about the status of your HVAC system and potential issues. One thing lost with this new generation is support for the Nest Temperature Sensor, so if that’s important you might want to get a Nest Thermostat E before they run out.

Scheduling |
Alright, let’s talk about the big feature of the 2020 Nest Thermostat – Scheduling. Technically, this isn’t a new feature, all previous models have offered it. However, it’s important on the new model because this one doesn’t “learn” your schedule at all and the schedule takes greater importance compared to the E.
When you go through setup on the Nest Thermostat in the Google Home app, Google will prompt you to set up a schedule. By default, you’ll have 4 different portions of each day. One for the morning when you get up (Comfort), one for the day when no one is home (Eco), one for the evening when everyone is at home and wants to be comfortable (Comfort), and one for when you’re asleep (Sleep). You might need to tweak the default times or even the number of “portions” of the day depending on your circumstances, and that’s pretty easy in the app.



Scheduling on the Nest Thermostat kicks in year-round, so you’ll need to manually change the schedule if you want different temperatures during the various seasons. Each mode works with heating and cooling though, so if you have a set high and low you want year-round, the schedule can get it done.
One notable change with this schedule is that there’s no “Eco” mode that can override the schedule anymore. That’s a shame, honestly. In the cool fall months, I was enjoying skipping the schedule on my Nest Thermostat E and using Eco mode to keep the AC/heat turned mostly off, only kicking in if the house was truly too cold or warm. With the Nest Thermostat (2020), the system is either off entirely or using your schedule, there’s no in-between unless you manually change the temperature.

Verdict & where to buy |
My final verdict on the 2020 Nest Thermostat is that it’s basically a no-brainer. It has a slick design that works well and cuts costs in the right areas. At $129, it’s a great value that can pay itself off very quickly with the money you’ll save on heating and cooling. Unless you absolutely need the learning features of Google’s $249 option, I can see no reason to tell you to go for that model. That said, I think it’s important to note that if you already have a Nest Thermostat — whether that be a Learning Thermostat or E — there’s basically no reason to upgrade unless that older model is somehow failing.
Nest Thermostat is available for $129 from most major retailers including:
FTC: We use income earning auto affiliate links. More.




Comments