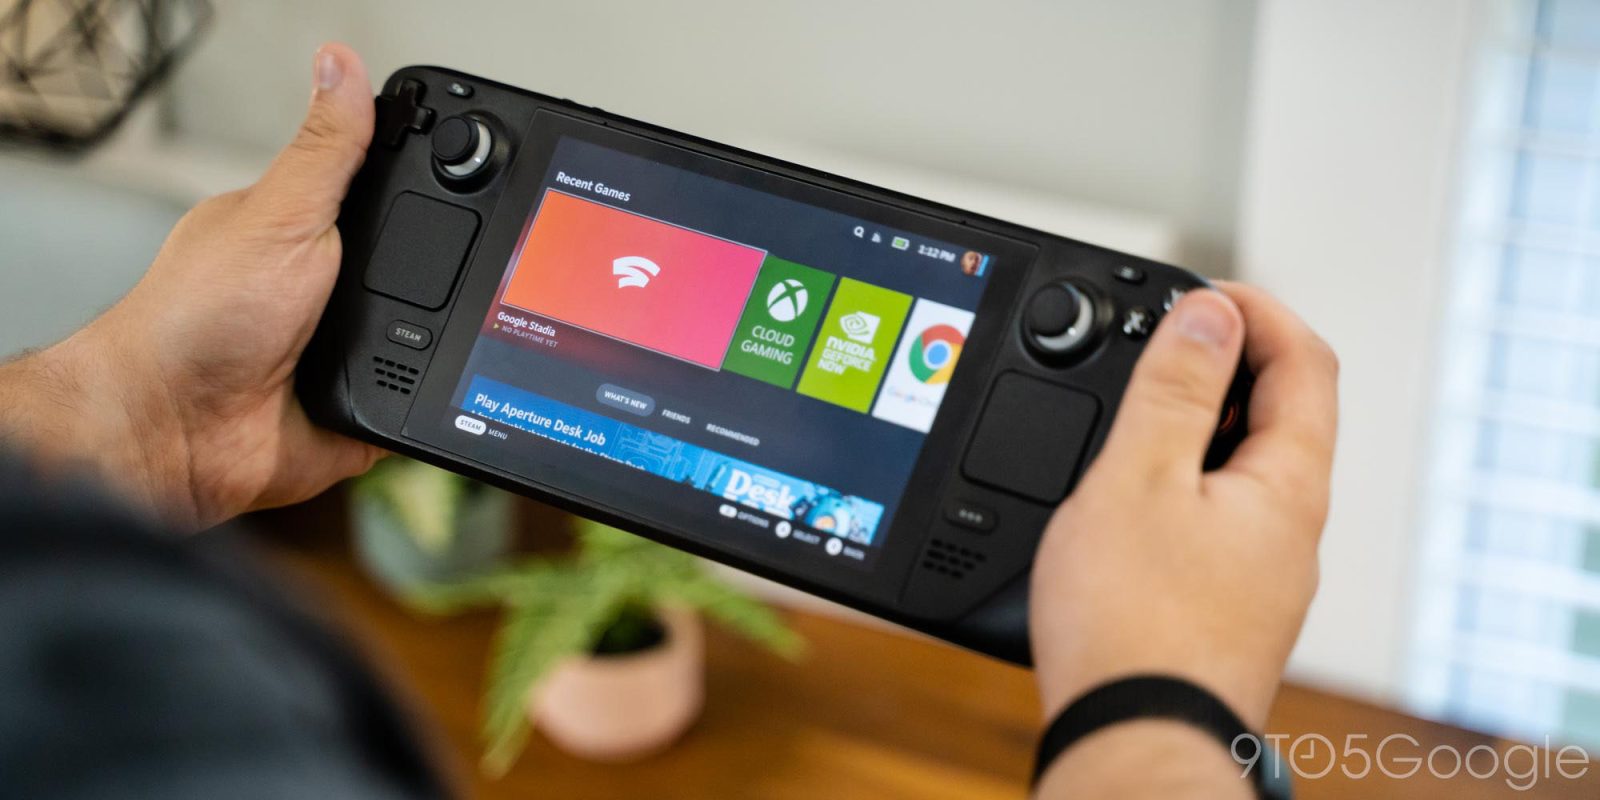
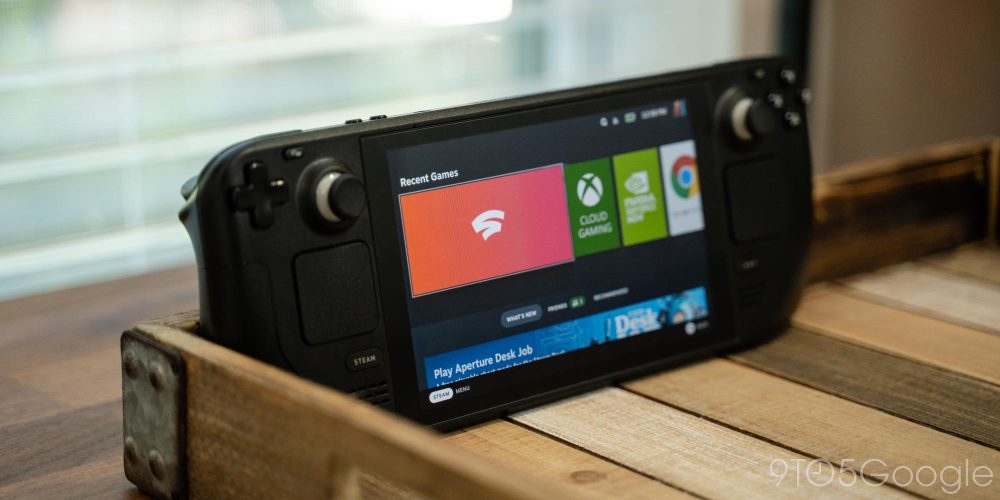
The Steam Deck can do an incredible amount, including allowing you to easily access Stadia games wherever you have an internet connection. This guide will take you through a relatively straightforward process that adds a Stadia shortcut to your Steam library, letting you jump in at a moment’s notice. You can even do it with Xbox Cloud Gaming and GeForce Now on the Steam Deck.
Things to know before adding Stadia to your Steam Deck
Before we get started down the process of adding Stadia to your Steam Deck, there are a few things to note. While Stadia has an app for most devices, including Android and iOS, the Steam Deck doesn’t get one of those.
Rather, this process really just adds a Microsoft Edge browser to your Steam library, which you’ll set to have automatically open up Stadia.
Microsoft worked to set up Edge for the Steam Deck to be compatible with Xbox Game Pass, which in turn set the groundwork for Stadia to easily be set up on a Steam Deck as well. The process you’ll go through is relatively risk free, since you’re only modifying an app and not the Linux-based SteamOS.
You can connect a Bluetooth mouse and keyboard – this is recommended – or you can plug in a USB mouse and keyboard via any Steam Deck dock. Generally, any third-party dock that has a couple of USB ports for easy connection will work well.
If you don’t have one on hand, the process is still easy to complete with the built-in virtual keyboard, though it takes just a little bit longer. You can access the keyboard at any time by hitting Steam + X on the Steam Deck.
Adding Stadia to your Steam Deck library
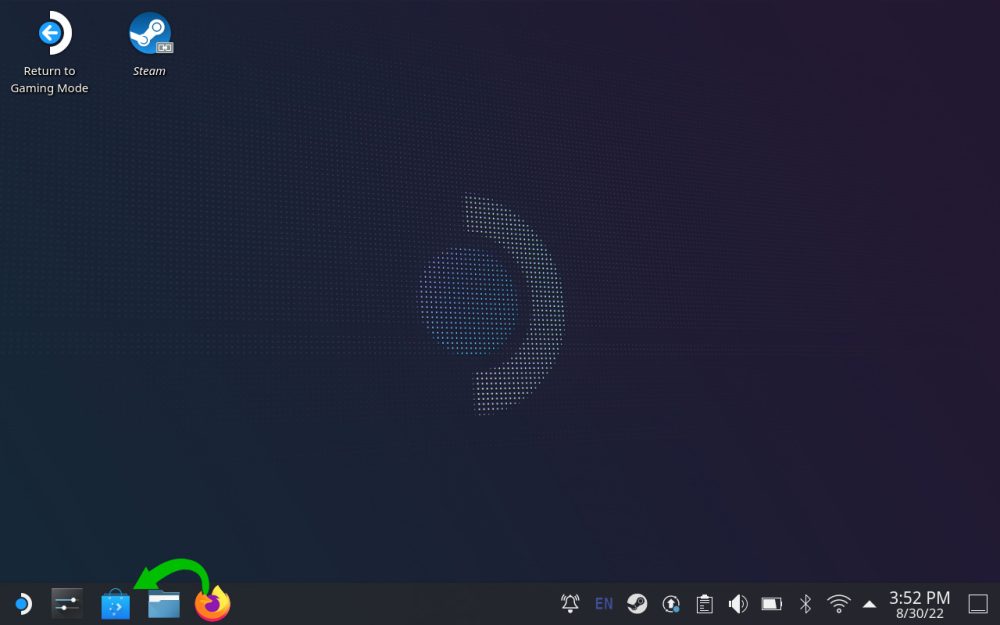
Most of this process will take place in the desktop mode. Head there first by hitting the Steam button and then navigating to Power and Switch to Desktop. After that, you’re ready to begin.
- Hover your cursor over the Discover Software Center icon down in the bottom left. Click it.
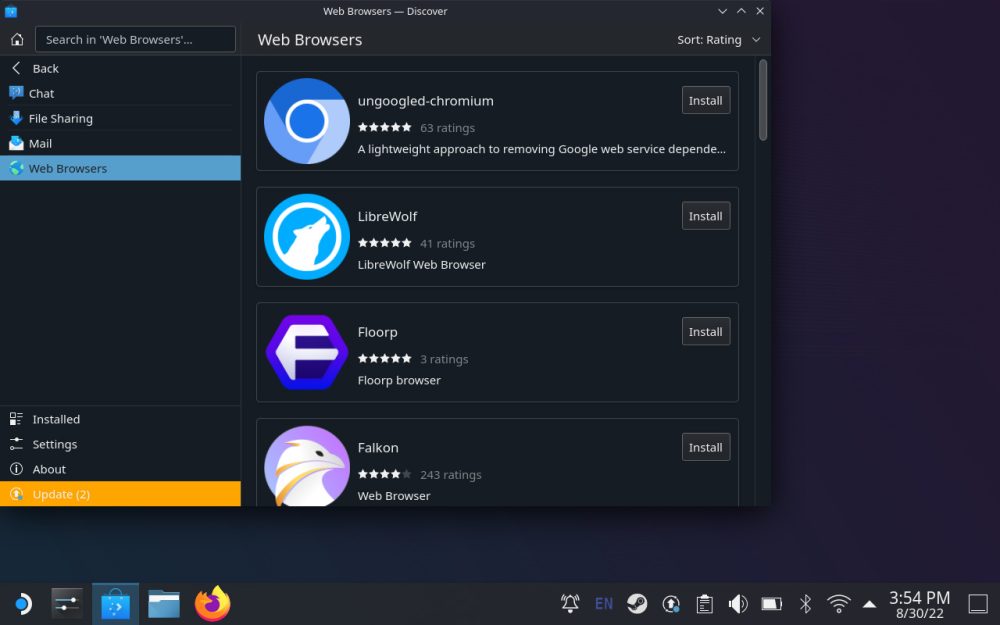
- Once it’s open, find Applications and then navigate to Internet. Find and click Web Browsers.
- Find and click Microsoft Edge. Hit Install.
Once Microsoft Edge is installed, your next step is to add it to Steam as its own instance, allowing you to open a specific shortcut.
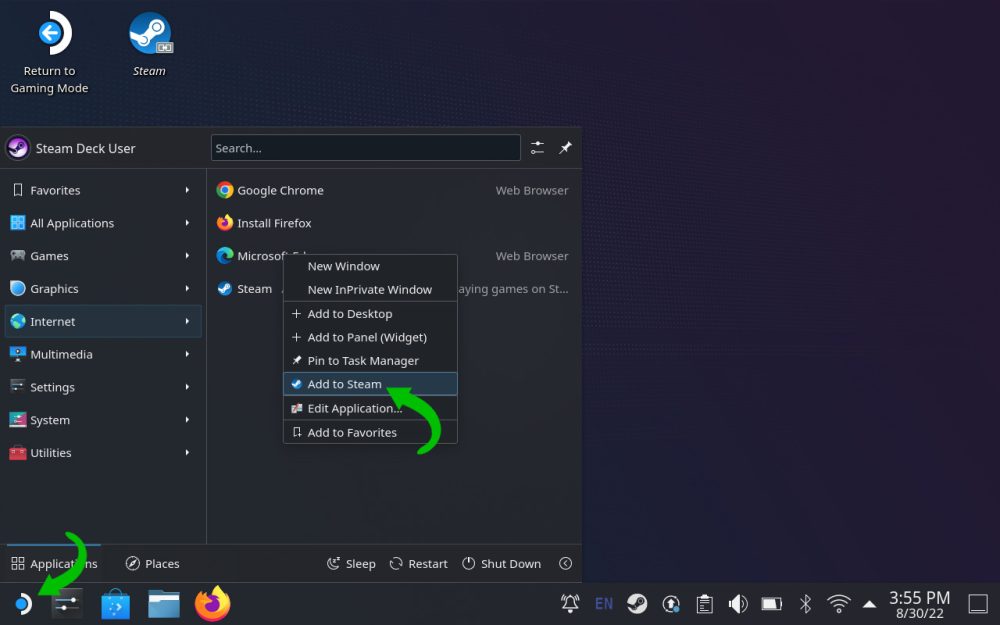
- Close the window and hit the Application Launcher icon all the way at the bottom left of the screen.
- Under the Internet section, find and right-click Microsoft Edge. Hit Add to Steam.
- Note: If using the Steam Deck’s keyboard and trackpads, you can right-click by pressing in on the left trackpad.
The next step will have you open SteamOS’s console app. Here, you’ll give Microsoft Edge more control than it normally would have.
- Close all windows and head back to the desktop.
- Click Application Launcher again (bottom left corner) and click System. From there click Konsole to open it.
- Type in the following:
flatpak --user override --filesystem=/run/udev:ro com.microsoft.Edge- Hit Enter.
- Type in “exit” and hit Enter.

After giving Microsoft Edge more permissions, you’ll need to specify what this new shortcut will do when you open it. The following steps are very important.
- At the top of the desktop, open the Steam shortcut.
- Under the Library section, find and right-click Microsoft Edge. Hit Properties.
- Do the following:
- Change the name to Stadia.
- Under LAUNCH OPTIONS add the following to the end of that code:
--window-size=1024,640 --force-device-scale-factor=1.25 --device-scale-factor=1.25 --kiosk "https://www.stadia.google.com"
After setting up the Stadia shortcut, you need to change how the controls work in game. Without these next steps, you wouldn’t be able to play any game properly.
- Find the newly named Stadia in the Steam Library and right-click it.
- Select Manage and then Controller layout.
- Select BROWSE CONFIGS. Under Templates, hit Gamepad with Mouse Trackpad.
- Hit APPLY CONFIGURATION and then click DONE.
Once the main controls are set, we recommend adding a couple more. This next process requires you to hop back into gaming mode, which allows better controller editing.
- Hit Return to Gaming Mode.
- Note: The rest can be accomplished with the Steam Deck controller and touchscreen.
- In the Library, navigate to Stadia and hit Play.
- Tap the physical Steam button on the Steam Deck. Under the Stadia section, select Controller settings with the gamepad.
- Press the A button.
- Select Edit Layout.
- Scroll down and find the Back Grips section and make these changes:
- Change L4 to Esc.
- Change R4 to Shift.
- Change R5 to Tab.
- Hit the B button until you’re back in Stadia.
That’s it! That process takes you through the brunt of the work in order to get Stadia successfully on your Steam Deck. The last bit is very important.
Since you don’t have a Stadia menu button on the controller, the L4 button acts as your Escape key, allowing you to hold it down to exit games. The other back grips – R4 and R5 – pressed together activate a Shift+Tab command, which opens the friends menu.
Adding Stadia artwork to your new shortcut
Now that you have Stadia set up and ready to go, you’ll likely want to make it look official. You can use these icons below to flesh out the Stadia shortcut on your Steam Deck. We recommend opening this article in Microsoft Edge on your Steam Deck – mainly because it’s already installed – and downloading these images there.
Alternatively, you can move these files onto a USB flash drive and open them on your Steam Deck in desktop mode.


Note: In desktop mode on the Steam Deck, you can open Microsoft Edge in the Application Launcher.
Once you have these files downloaded in a safe place, you can move on to the final touches of your Stadia install.
- In desktop mode, open up Steam and find Stadia in your Library.
- Right-click it and select Properties.
- Click the gray box next to the application title and select the stadia.steamdeck.icon file from the file browser.
- Note: Under the file path “/home/deck/” you’ll find the Downloads and Documents folder. This is where you should have saved your images.
- On the Stadia application page where you see the Play button, right-click the dark background. From the options that appear, select Set Custom Background. Choose the stadia.steamdeck.banner file.
- Back out to the Steam Library page. Hit Home and scroll down until you see the grey Stadia box under the All Games section. Right-click it and select Manage and hit Set custom artwork. Select the stadia.steamdeck.capsule file.
- Repeat the last step for the Stadia box under the Recent Games section.
Once you finish this last set of steps, you should have a fully fleshed-out Stadia application sitting in your Steam library.
Can I add GeForce Now or Xbox Game Pass to my Steam Deck?
Since, in essence, you’re just taking an instance of Microsoft Edge and creating a shortcut to a specific website with a preset configuration, there’s nothing about this process that screams “Stadia only.”
In fact, this process was first developed by Microsoft in order to bring Xbox Cloud Gaming to the Steam Deck. If you do every single step exactly the same and replace the “www.stadia.google.com” with “www.xbox.com/play” in the code added to the Steam instance of Microsoft Edge, you’ll have yourself a perfectly working shortcut to Xbox Game Pass Ultimate.
You can do the same thing for GeForce Now by adding “https://play.geforcenow.com/” to the Steam Deck, though it seems this iteration is a little messier in general. Geforce Now on the Steam Deck has you sign in on Microsoft Edge before setting up the app. Without that step, you’re stuck with no way to play.
Of course, since this is quite the workaround, it isn’t going to be perfect. That being said, Stadia runs pretty well all things considered. Until we get an official Stadia app – which likely won’t happen any time soon – this will have to do.
More on Stadia:
- Google adds seven Stadia Pro games for August 2022 [U]
- Samsung’s latest gaming monitors have Google Stadia, GeForce Now, and more built-in
- Google adding four Stadia Pro games for September 2022, including Tri6: Infinite
FTC: We use income earning auto affiliate links. More.


Comments