
Android development has long only been possible on Mac, Windows, and Linux computers. That changed with the release of Chrome OS 69 and Linux app support. Here’s how you can start developing Android apps from Android Studio on Chrome OS.
Update: As of May 2019, Google has provided a simple, one-click installation process for Android Studio on Chrome OS. The instructions below on enabling ADB debugging and WiFi debugging are still valid and relevant.
How to install Android Studio on Chrome OS
- Switch to Developer Mode (Optional)
- Enable ADB debugging on Chrome OS (Optional)
- Enable Linux apps
- Download Android Studio
- Install Android Studio
- Add Launcher icon
- Enable Wi-Fi debugging (Optional)
- Connect to a device
- Start coding!
There are a few important steps you should take before we proceed.
First, in order to debug apps directly on your Chromebook, you’ll need to put your Chromebook into Developer Mode. If your Chromebook is not already in Developer Mode, doing so will require you to wipe your device. Please make sure you’ve backed up your important files before continuing.
Second, it’s currently not possible to debug your app on an Android device connected via USB in Android Studio for Chrome OS. According to Google, that ability should be coming later this year. Until then, to debug on an Android device, you will have to set up ADB debugging over WiFi, which is considered insecure.
Third, not all Chromebooks support Linux apps. Make sure your device is compatible before continuing.
Finally, you’ll need at least 6.4GB of storage space just to install Linux apps and Android Studio on Chrome OS. You’ll also need some additional space for your Android projects.
1. Switch to Developer Mode (Optional)
Developer Mode is only required by Android Studio on Chrome OS to debug your apps directly on your Chromebook. If you don’t plan to test your apps this way, you can skip to step 3.
First, turn your Chromebook off. Next, hold the Escape and Refresh keys and power your device back on. This will put your device into Recovery Mode. From there, press Ctrl-D to enter Developer Mode.
You’ll be prompted to confirm, because this, again, will wipe your device. Now every time it starts, you’ll be reminded for a number of seconds that your device is in Developer Mode. You can press Ctrl-D to bypass this message.
Because your device has now been wiped, you will need to set up your account again.
2. Enable ADB debugging on Chrome OS (Optional)
Like the previous step, this is only required for debugging Android apps on your Chromebook. If you don’t plan to do so, skip this step.
Open the Settings app, click “Google Play Store“, then “Manage Android Preferences” to open the Android Settings app. Then follow the usual procedure for enabling Developer Options.
Once in the Developer Options menu, enable ADB debugging.

3. Enable Linux apps
Open your Chrome OS Settings app, find “Linux Apps” and click “Turn On“. Your Chromebook will download the required files to use Linux apps. When complete, a new Terminal app will open.
4. Download Android Studio
Visit the Android Studio downloads page, and download the Android Studio package for Linux. The filename will look something like ‘android-studio-ide-173.4907809-linux.zip’. Once the download is complete, you will need to open the Files app and copy the zip from your Chrome OS Downloads to Linux Files.
5. Install Android Studio
Open the Terminal app, and type in the following command (be sure to type in the correct file name) to unzip Android Studio’s files:
unzip android-studio-ide-173.4907809-linux.zip
This will take a few minutes. When complete, run one more command to start Android Studio:
./android-studio/bin/studio.sh
You will now be greeted with the standard Android Studio setup wizard. Proceed with the setup as normal to download the required Android files.
6. Add Launcher icon
When the Setup is complete, the Android Studio Welcome window will appear. Android Studio is completely installed and ready to use, but as it stands, you would need to open Android Studio from the Terminal the same way we installed it. To make it easier, we can add a Launcher icon.
On the Android Studio Welcome window, at the bottom-right corner you will see Configure. Click that to open the menu, then choose Create Desktop Entry. Click OK on the menu that appears. Now Android Studio will appear in your Launcher.
7. Enable Wi-Fi debugging (Optional)
Enabling Wi-Fi debugging is only required if you want to debug apps on your Android device. If you don’t plan to do that, or are willing to wait until Google makes it possible to debug Android apps via USB from Android Studio on Chrome OS, you can skip this step. Wireless debugging is a security risk, and should be used with caution.
You will need a second (Windows, macOS, or Linux) computer with Android Studio installed to enable WiFi debugging on your Android device. Connect your device (with USB Debugging enabled) to your second computer, and run the following command:
adb tcpip 5555
If this is the first time you’ve run adb from your computer to this phone, you may be prompted to enable debugging. If this is the case, you may need to run the command again after enabling.
That’s it! You can disconnect your Android from the computer. Wireless debugging should now be enabled.
8. Connect to a device
Any time you want to connect Android Studio on Chrome OS for debugging you’ll need to follow this step. For this step, we need an IP address to connect to.
If you’re debugging directly on your Chromebook, make sure you enabled Developer Mode above. The IP you need is always 100.115.92.2
If you’re debugging your Android device, make sure you enabled wireless debugging above. Be sure that your Android and your Chromebook are on the same Wi-Fi network. Next you need the current IP address of your Android. This can usually be found in the Settings app. Find About Phone then tap Status. What you need is listed under IP Address.
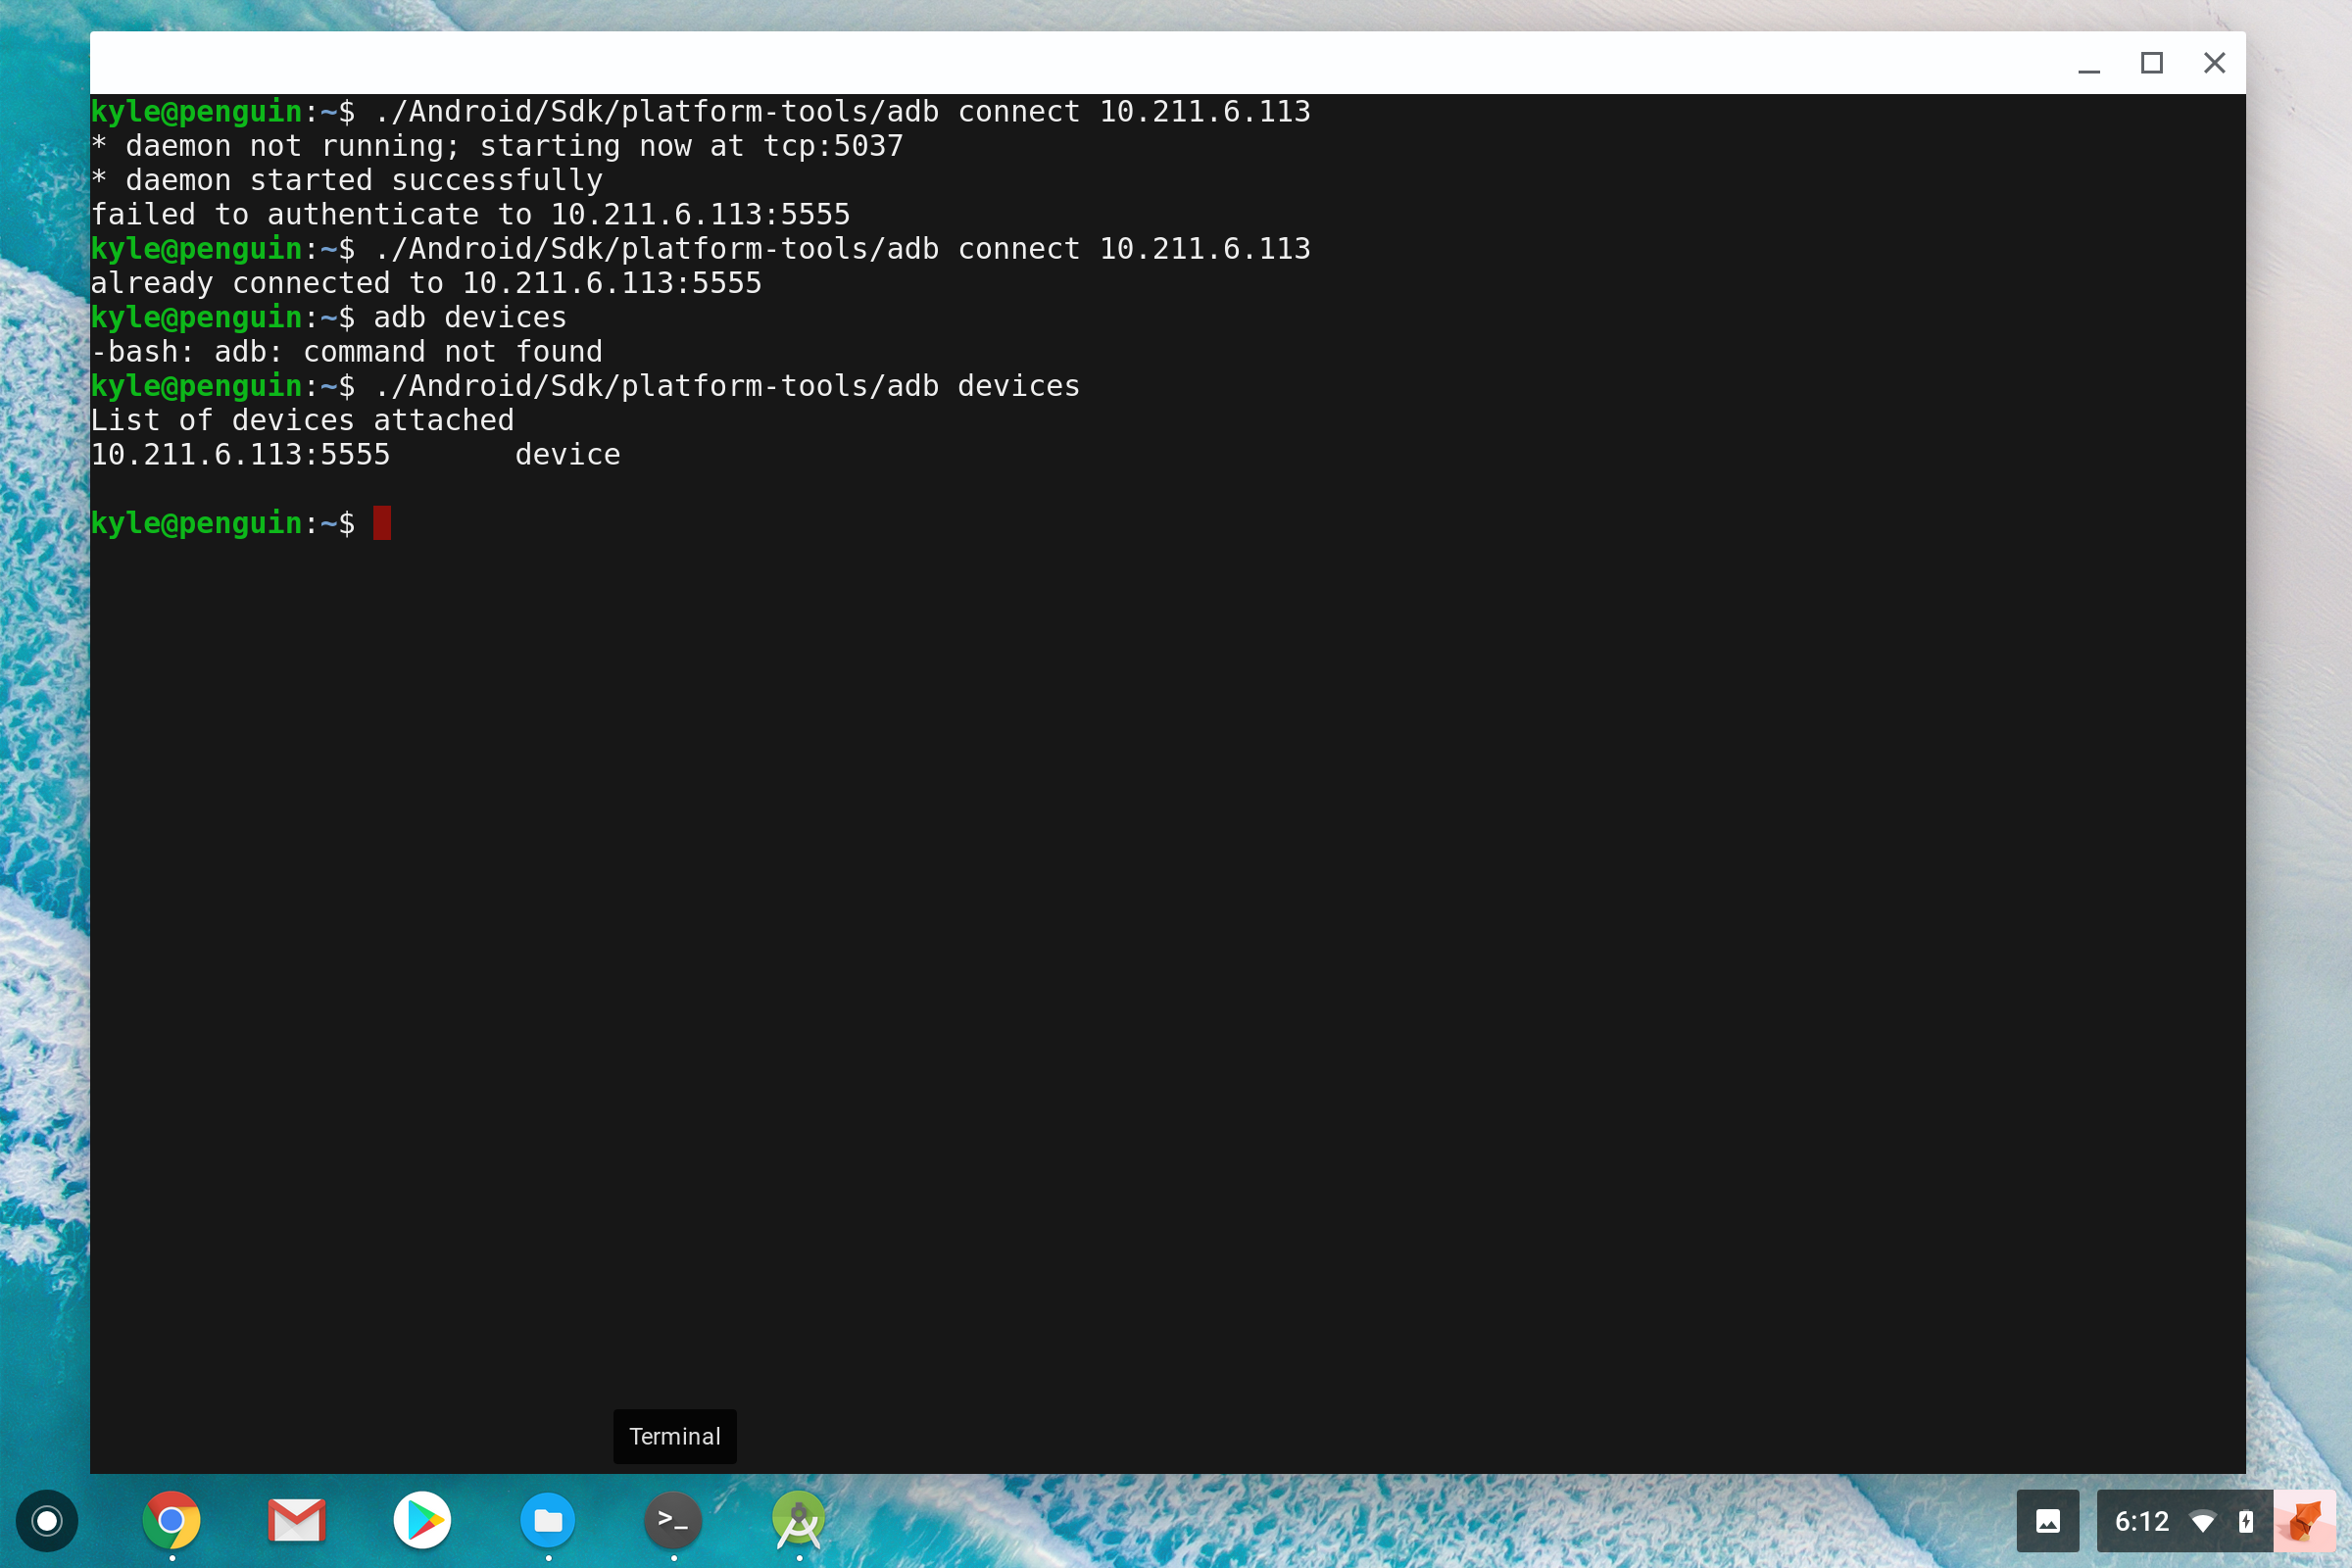
Now switch back to your Chromebook and open Terminal. From there, run the following command, using the Chromebook IP from earlier or the Android IP we just obtained:
./Android/Sdk/platform-tools/adb connect 10.211.6.113
The first time you run this command, it may say “failed to authenticate.” Just accept the debugging prompt on your device, and ignore the message. Your device will now appear in Android Studio as a device for debugging.
You can verify that everything worked correctly with the following command:
./Android/Sdk/platform-tools/adb devices
9. Start coding!
You’re all set! You can now develop Android apps directly from your Chromebook and debug them on an Android and/or directly on your Chromebook. The ability to run Android Studio on Chrome OS makes it arguably the most versatile operating system currently on the market.
Check out 9to5Google on YouTube for more news:
FTC: We use income earning auto affiliate links. More.

Comments